> ## Documentation Index
> Fetch the complete documentation index at: https://brightdata-ipv6-release.mintlify.site/llms.txt
> Use this file to discover all available pages before exploring further.
# How to set up Entra ID (formerly Azure Active Directory) SSO and provisioning with Bright Data
* Prepare application
* Setup SSO
* Setup SCIM provisioning
## Prepare Application
* Go to [https://entra.microsoft.com/](https://entra.microsoft.com/) and log in to your account.
* Create Enterprise application:
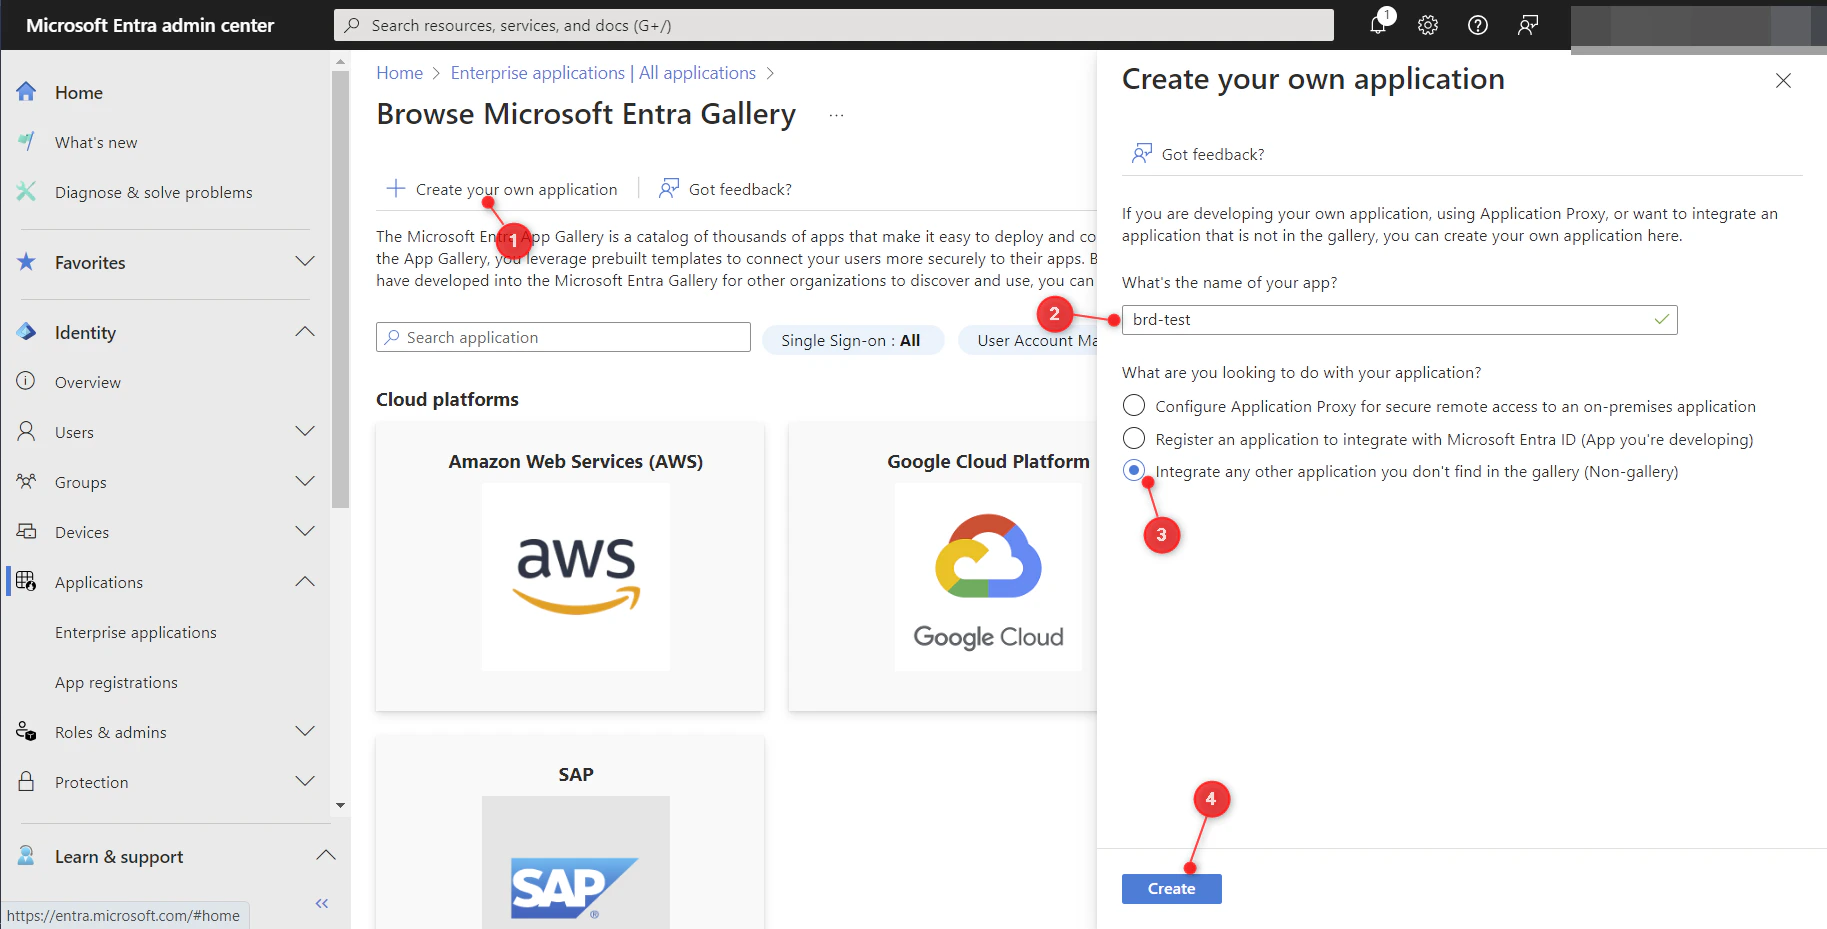
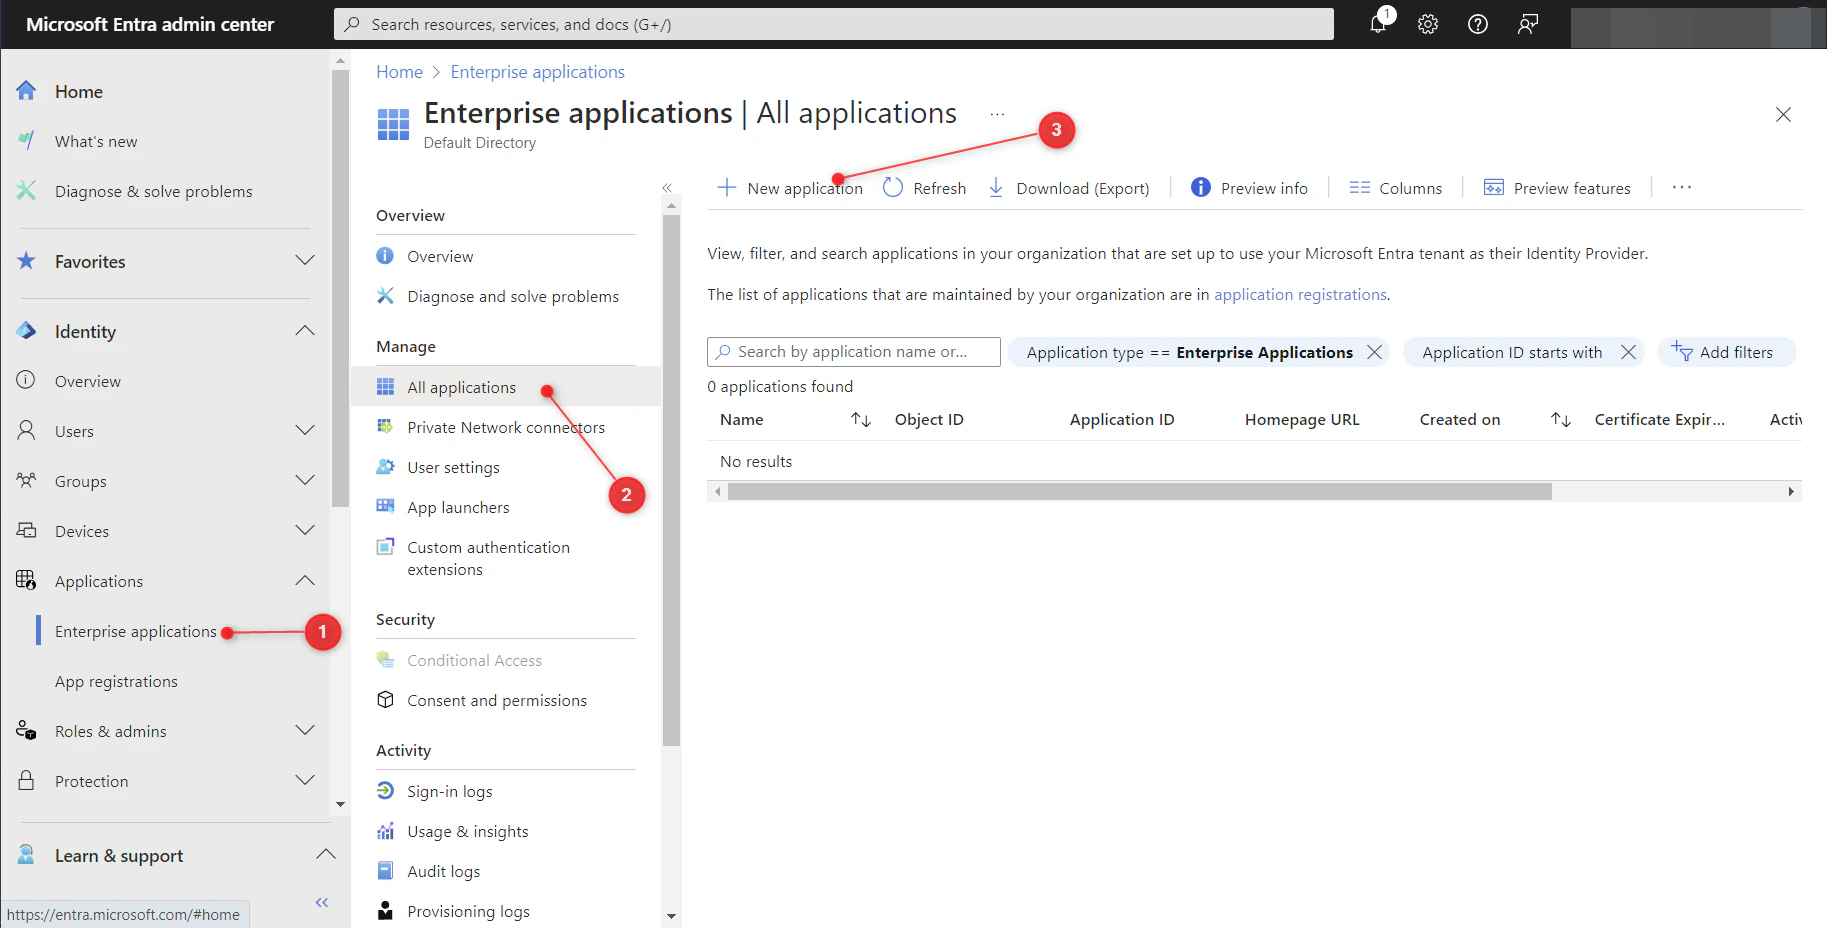 * Click “Create your own application”
* Enter name of your application
* Select “Integrate any other application you don't find in the gallery (Non-gallery)”
* Click “Create”
* Click “Create your own application”
* Enter name of your application
* Select “Integrate any other application you don't find in the gallery (Non-gallery)”
* Click “Create”
 ## Setup SSO
* Go to [https://brightdata.com](https://brightdata.com) and log in to your account.
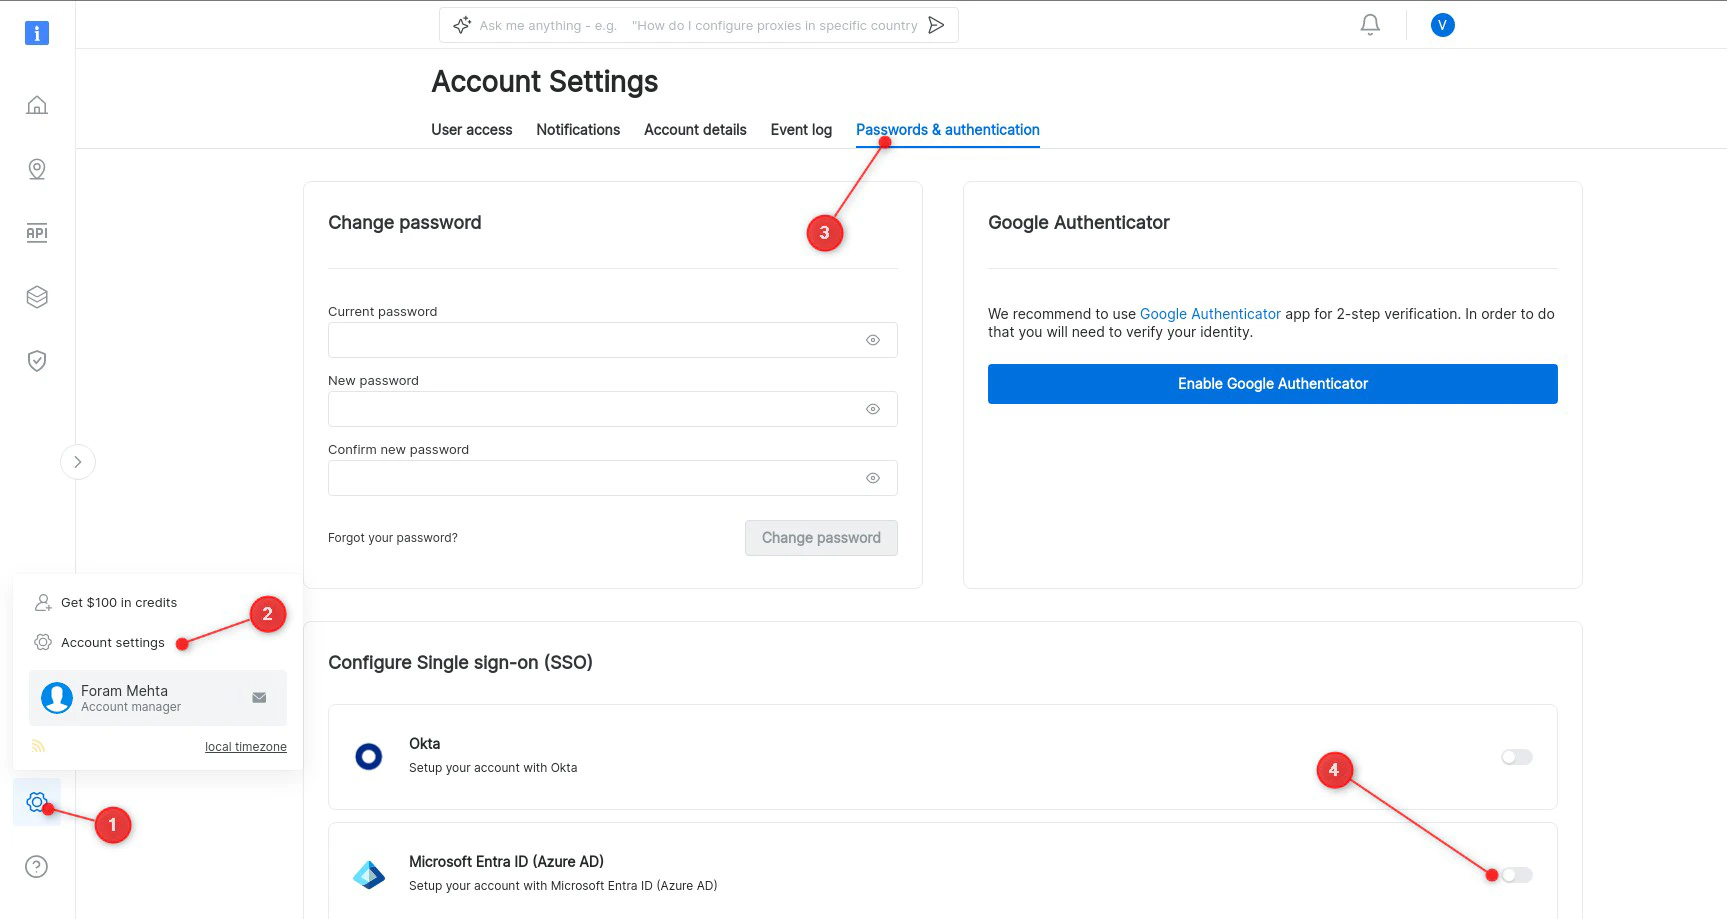
* Choose Settings->Account settings->Passwords & authentication in left side menu and toggle Microsoft Entra ID (Azur AD) switch
## Setup SSO
* Go to [https://brightdata.com](https://brightdata.com) and log in to your account.
* Choose Settings->Account settings->Passwords & authentication in left side menu and toggle Microsoft Entra ID (Azur AD) switch
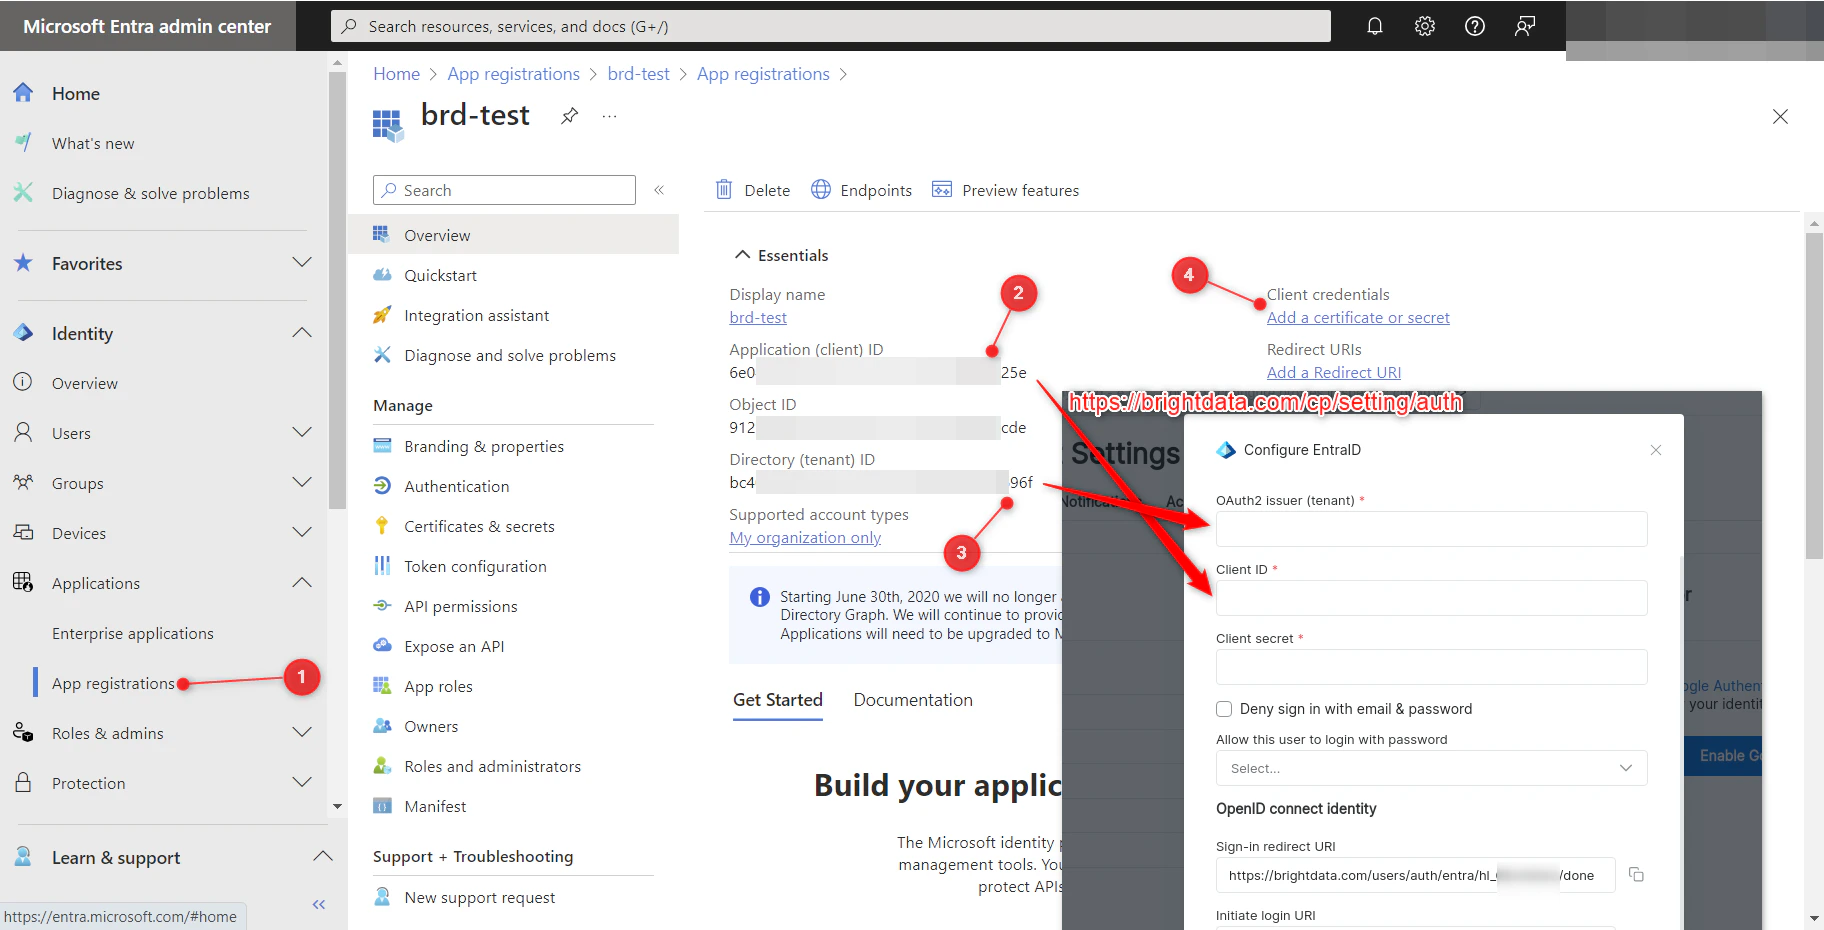
 * From “App registrations” view select your application.
* Copy “Application (client) ID” to “Client ID”
* Copy “Directory (tenant) ID” to “OAuth2 issuer (tenant)”
* Go to “Add a certificate or secret”
* From “App registrations” view select your application.
* Copy “Application (client) ID” to “Client ID”
* Copy “Directory (tenant) ID” to “OAuth2 issuer (tenant)”
* Go to “Add a certificate or secret”
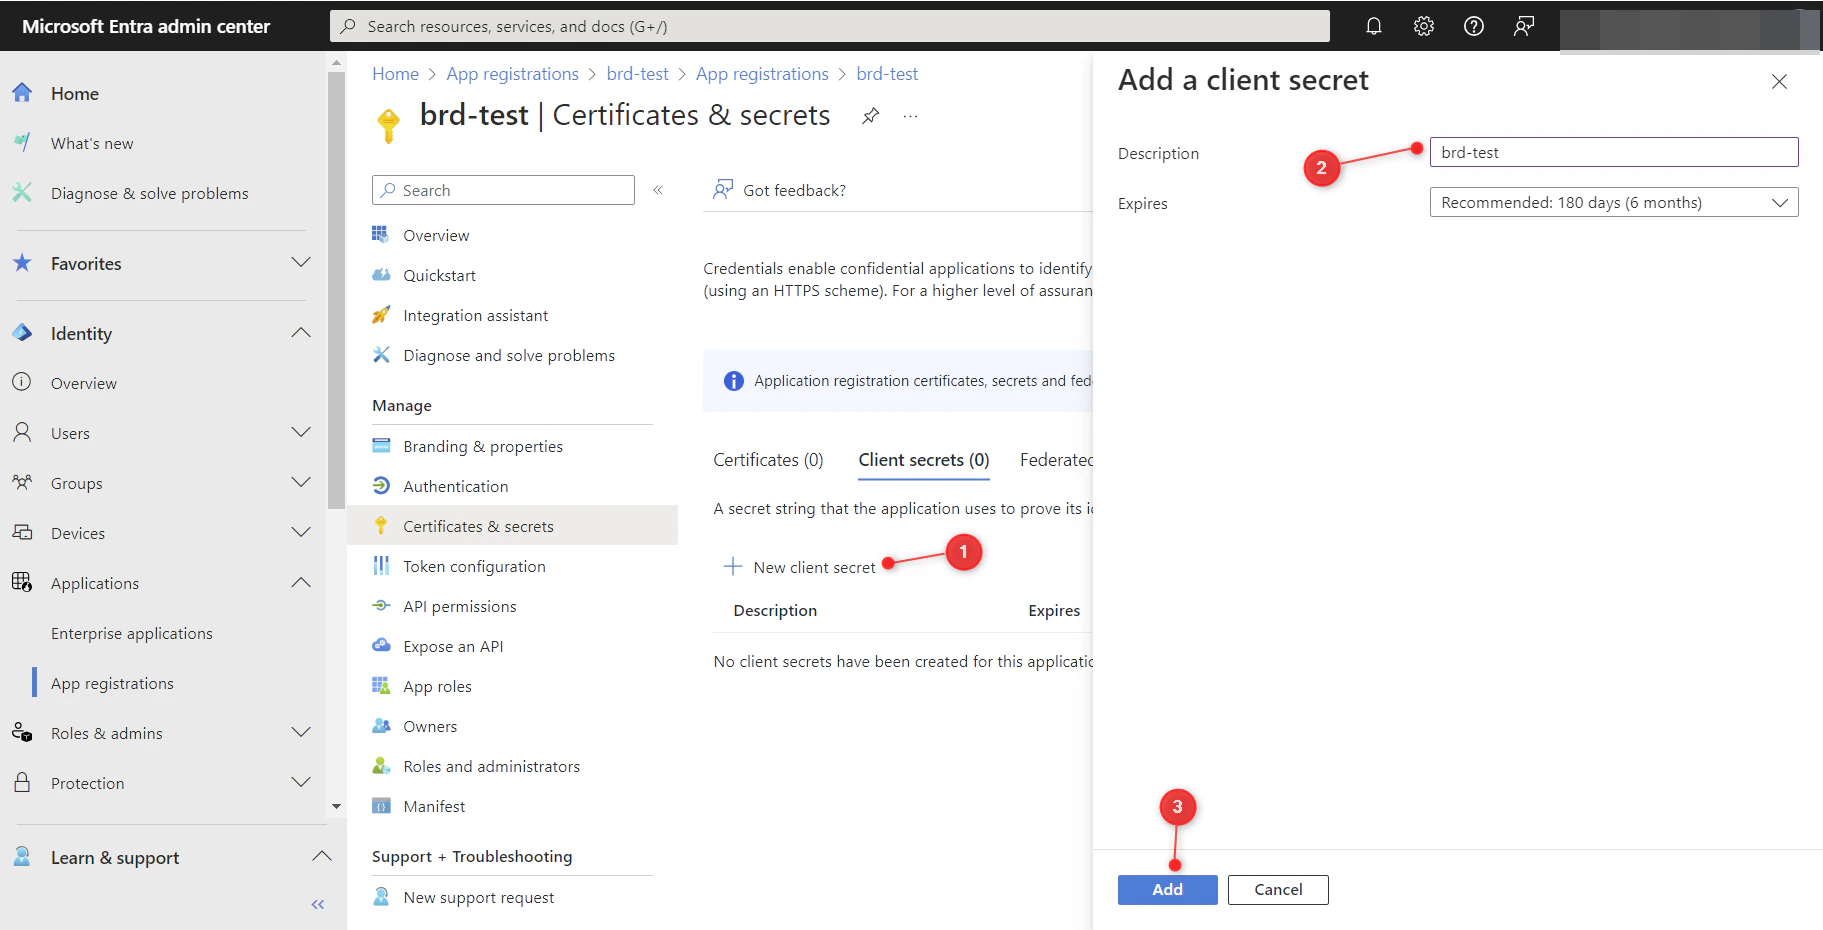
 * At secrets screen click “New client secret”
* Fill Description
* Click “Add”
* At secrets screen click “New client secret”
* Fill Description
* Click “Add”
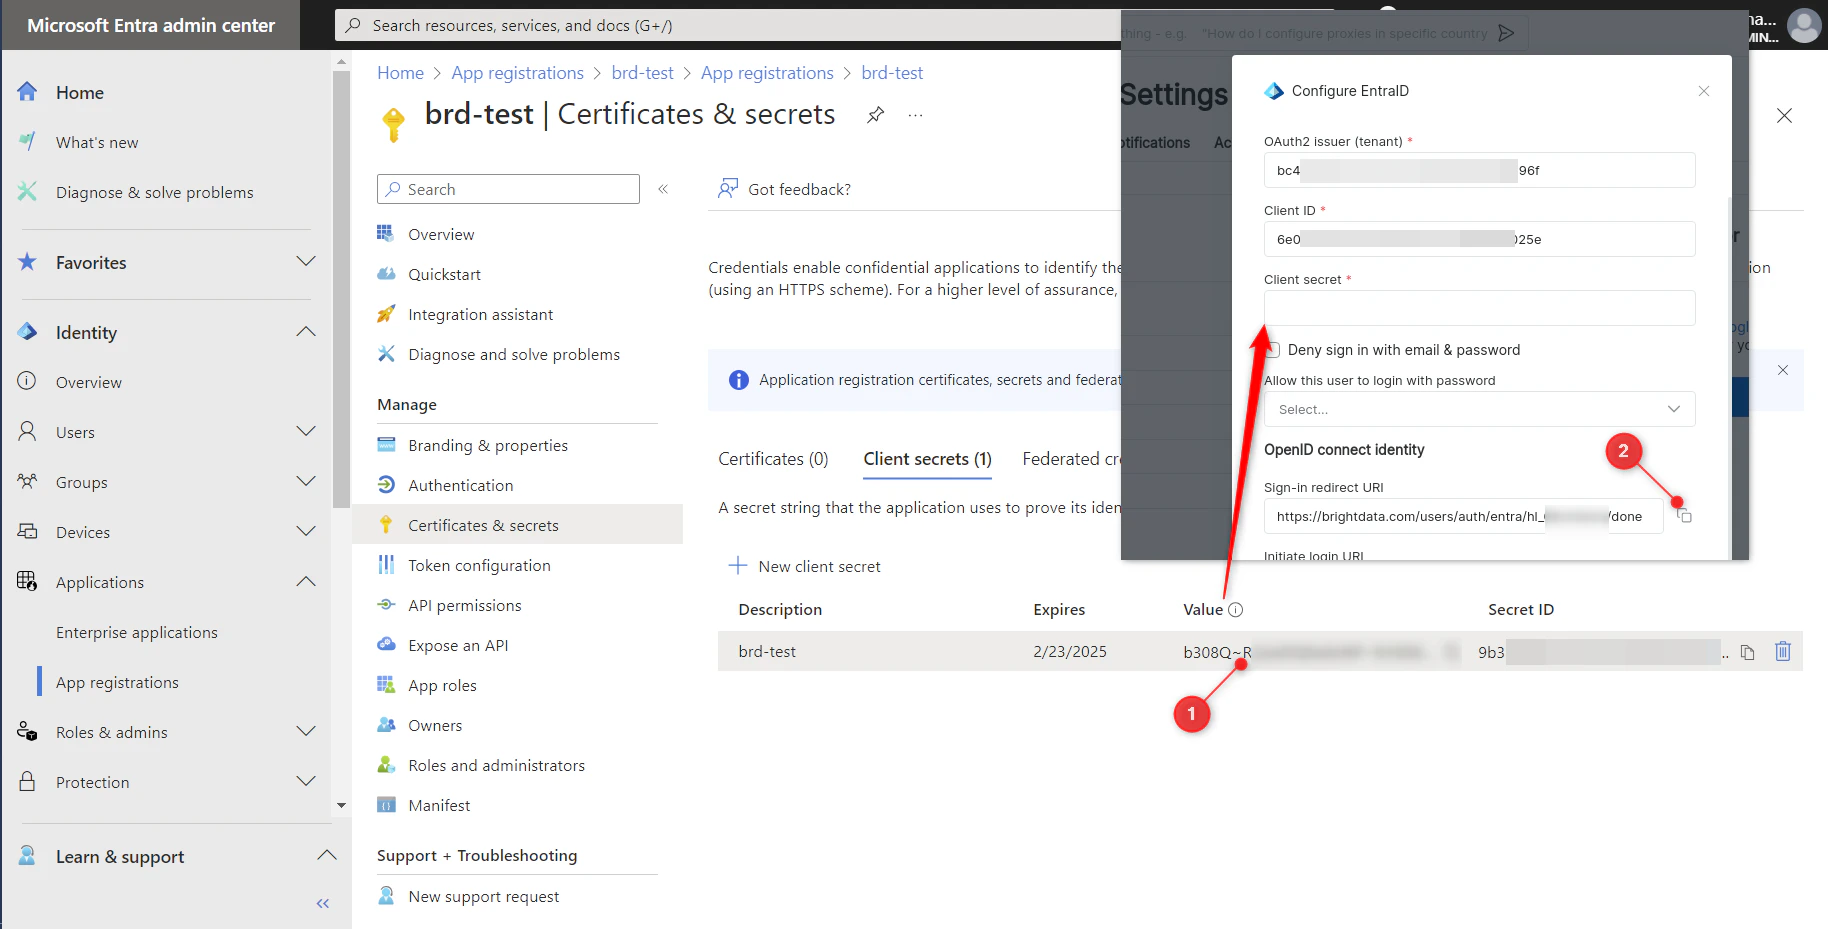
 * Once secret is created copy secret value to “Client secret”.
* Copy “Sign-in redirect URI” to be used at next step
* Once secret is created copy secret value to “Client secret”.
* Copy “Sign-in redirect URI” to be used at next step
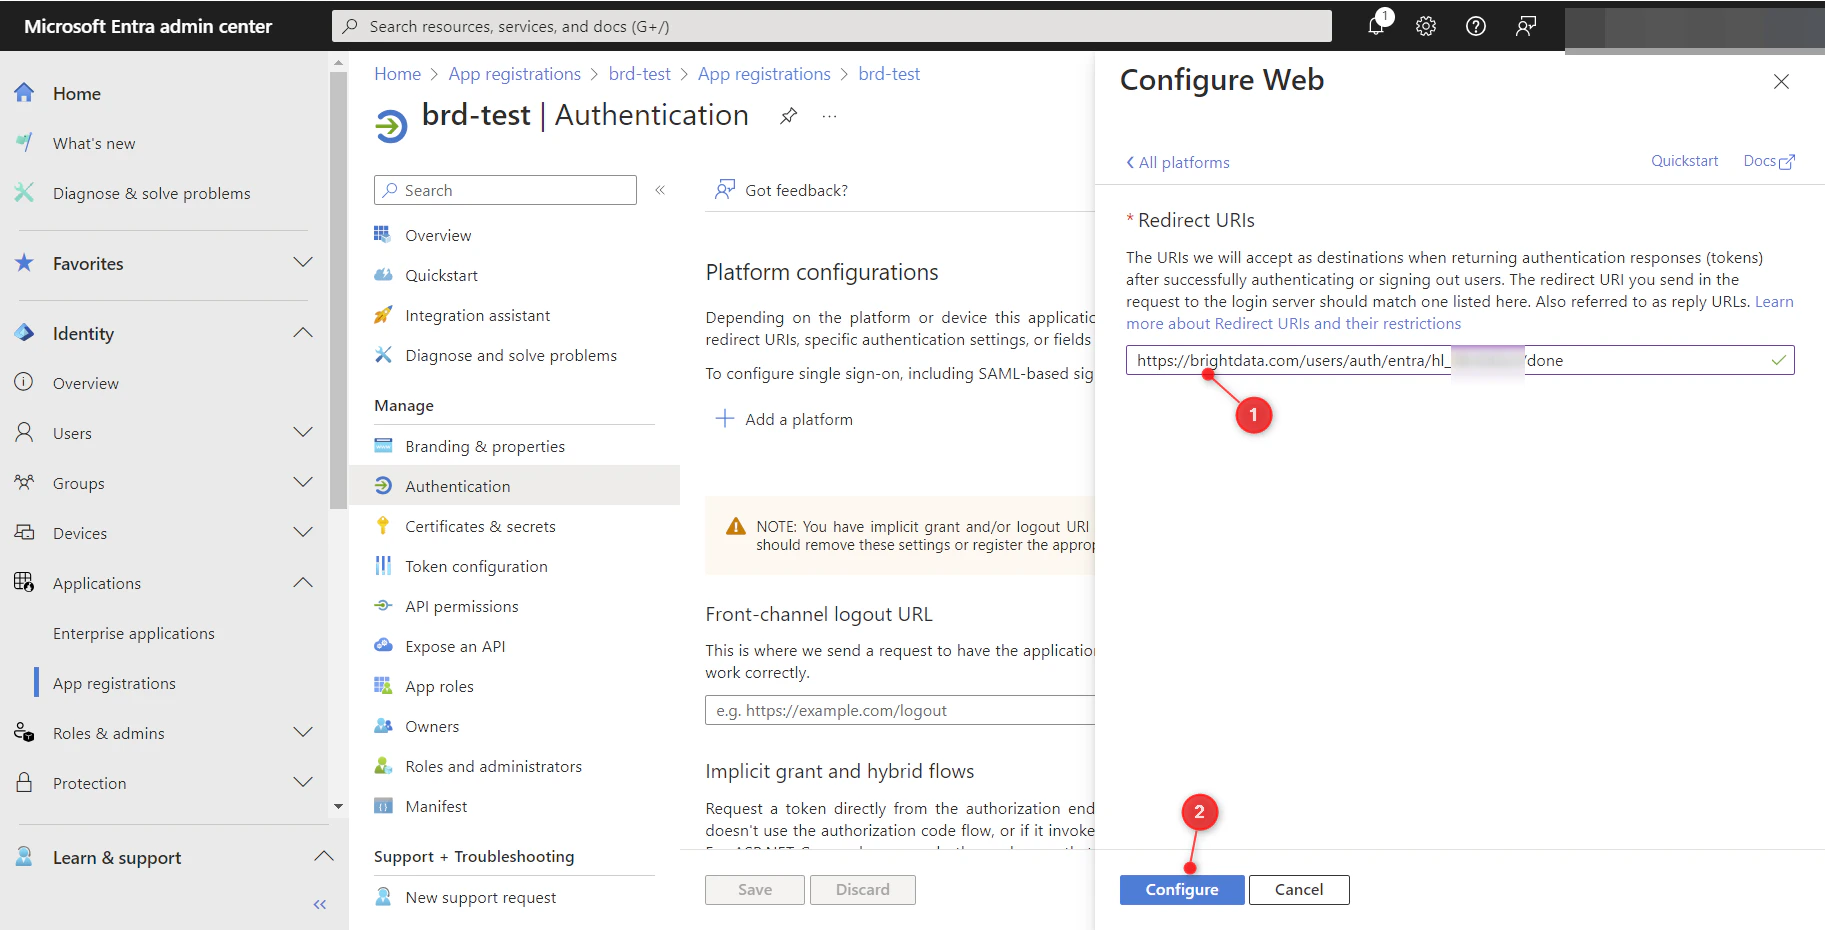
 * At “Authentication” screen click “Add platform” and select “Web”
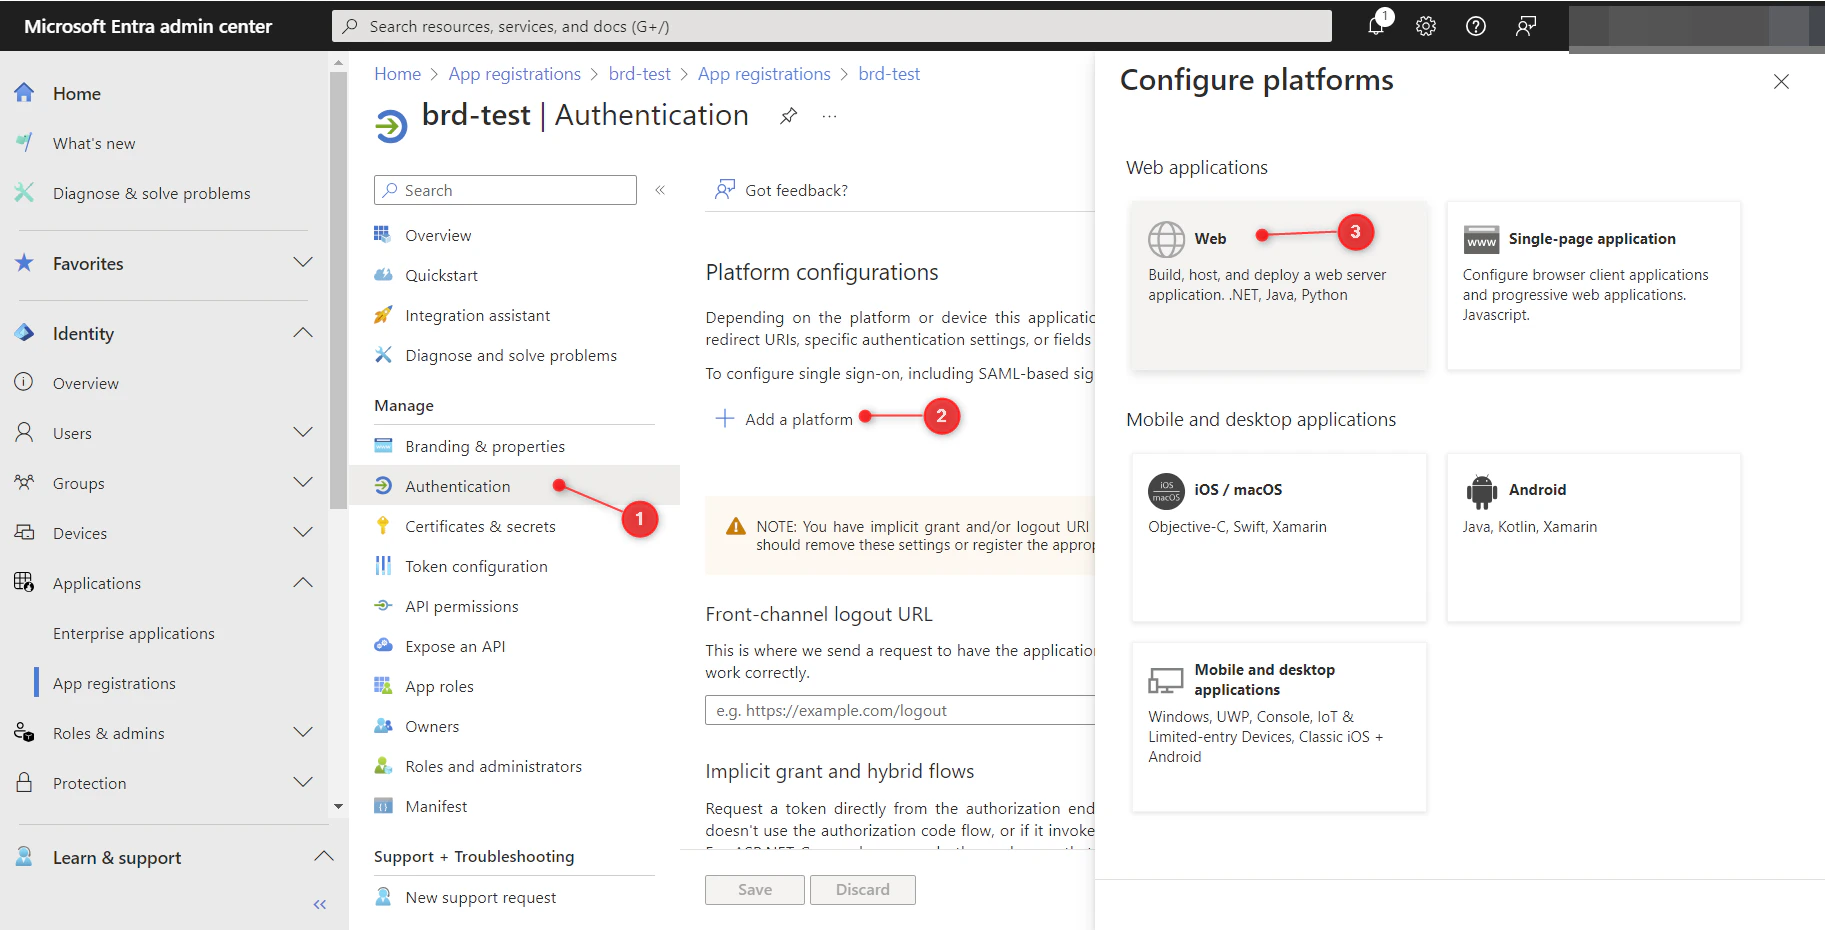 * Paste previously copied “Sign-in redirect URI” to the “Redirect URIs” and save settings by clicking “Configure”:
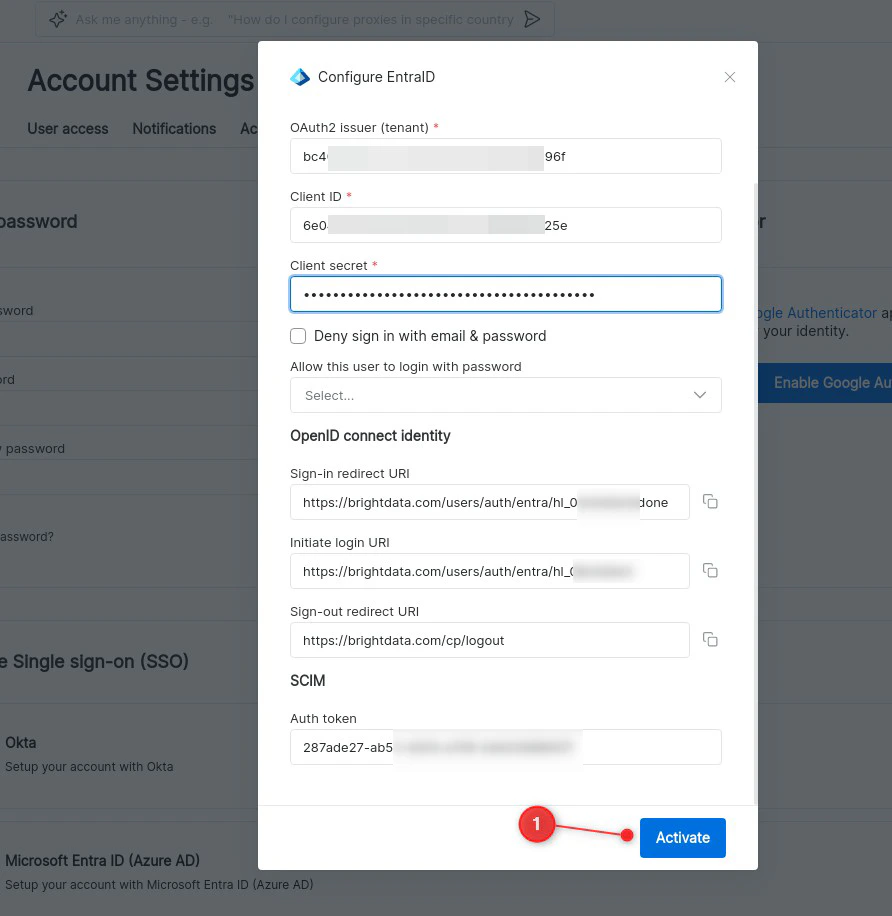
 * Activate EntraID integration at BrighData control panel and test login:
 ## Setup SCIM provisioning
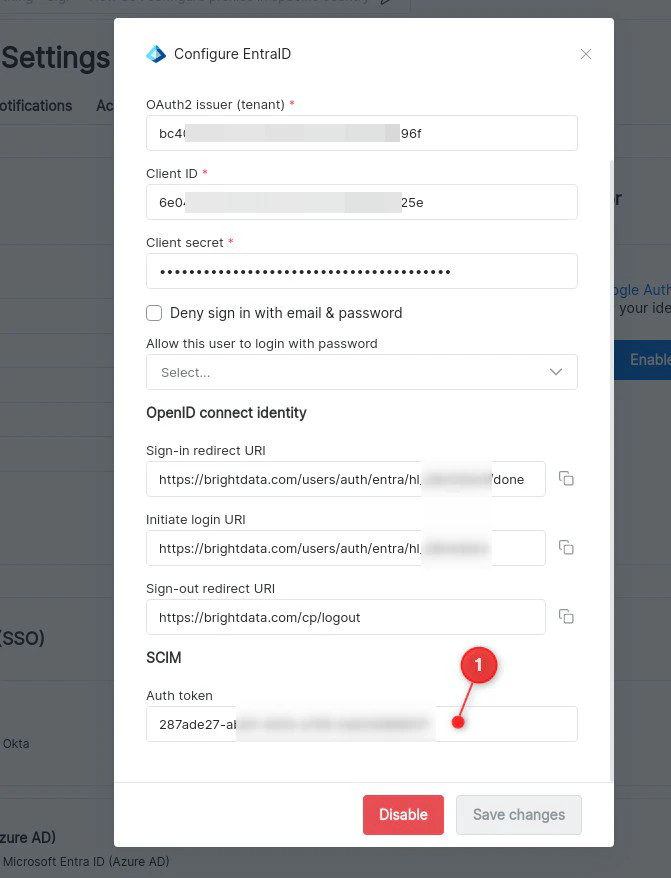
* Copy “Auth token” from SCIM section of BrightData EntraID settings:
## Setup SCIM provisioning
* Copy “Auth token” from SCIM section of BrightData EntraID settings:
 * Select your application from “Enterprise Applications” view and go to “Provisioning” settings:
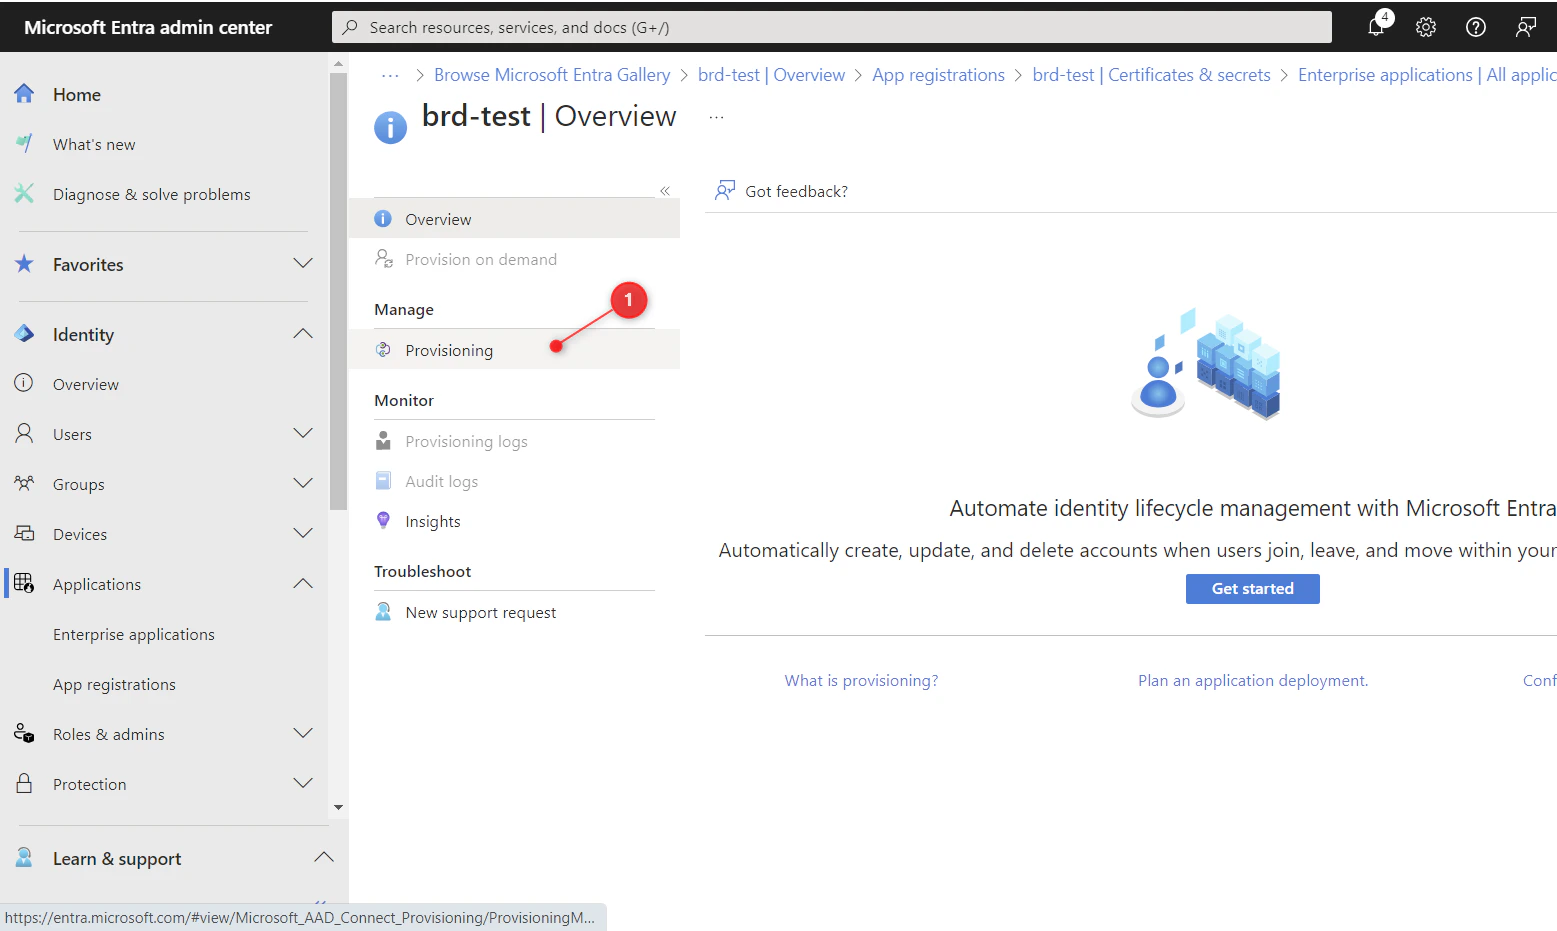
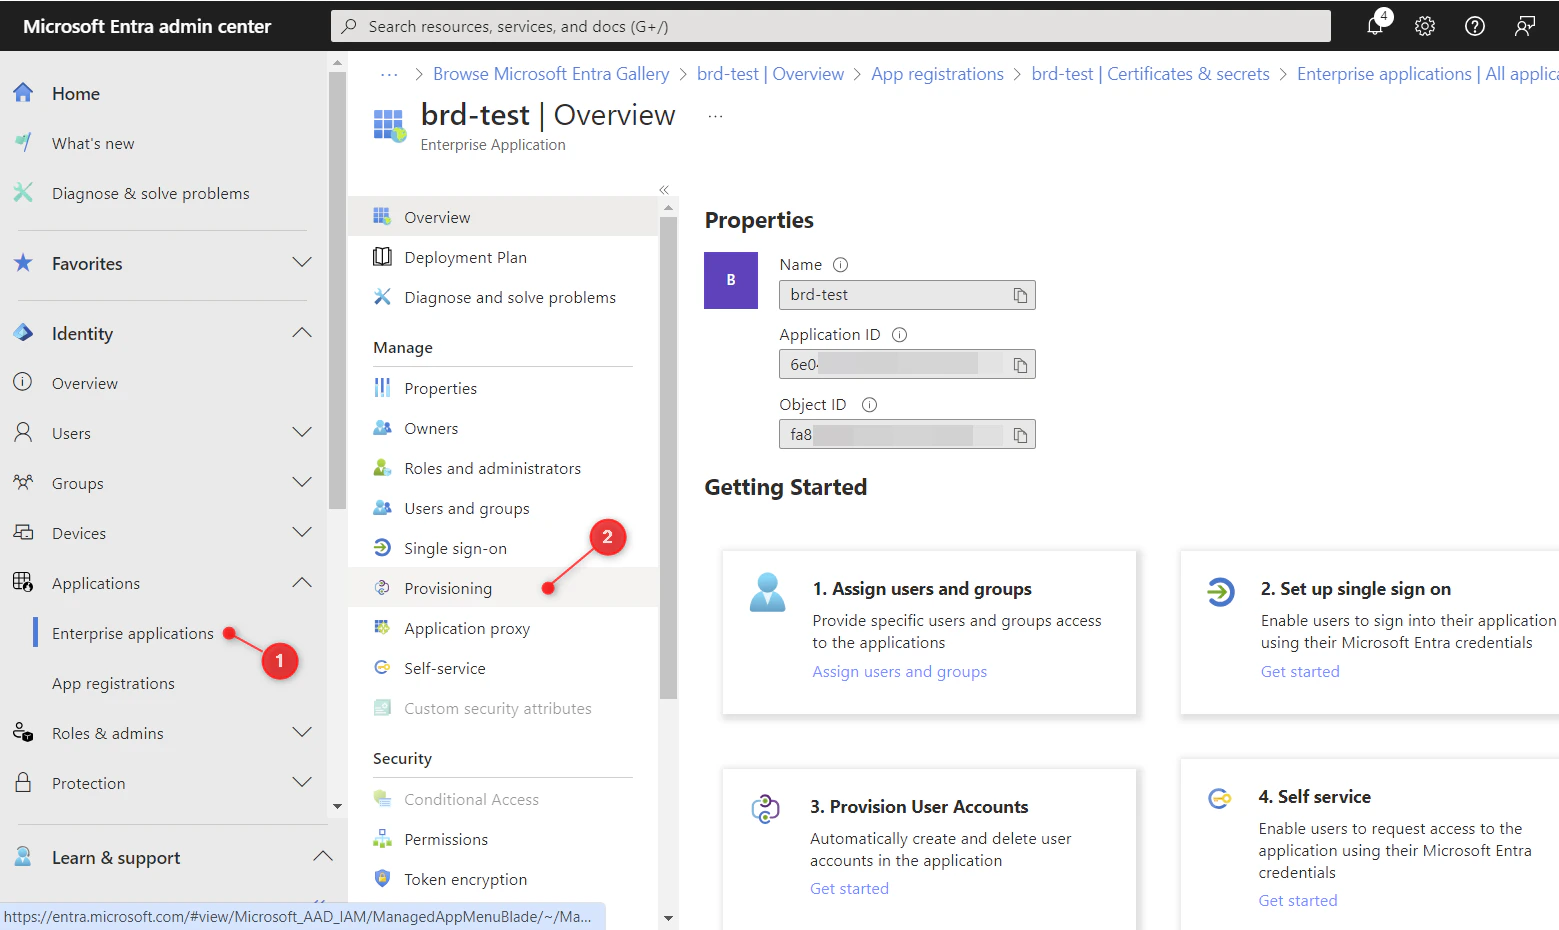 * Select “Provisioning” under “Manage” menu:
 * Select “Automatic” Provisioning Mode
* Fill “Tenant URL” with [https://brightdata.com/users/auth/scim](https://brightdata.com/users/auth/scim) value
* Fill “Secret Token” with previously copied value from BrightData control panel settings
* Test Connection. You should see successful message in top right corner
Save Settings
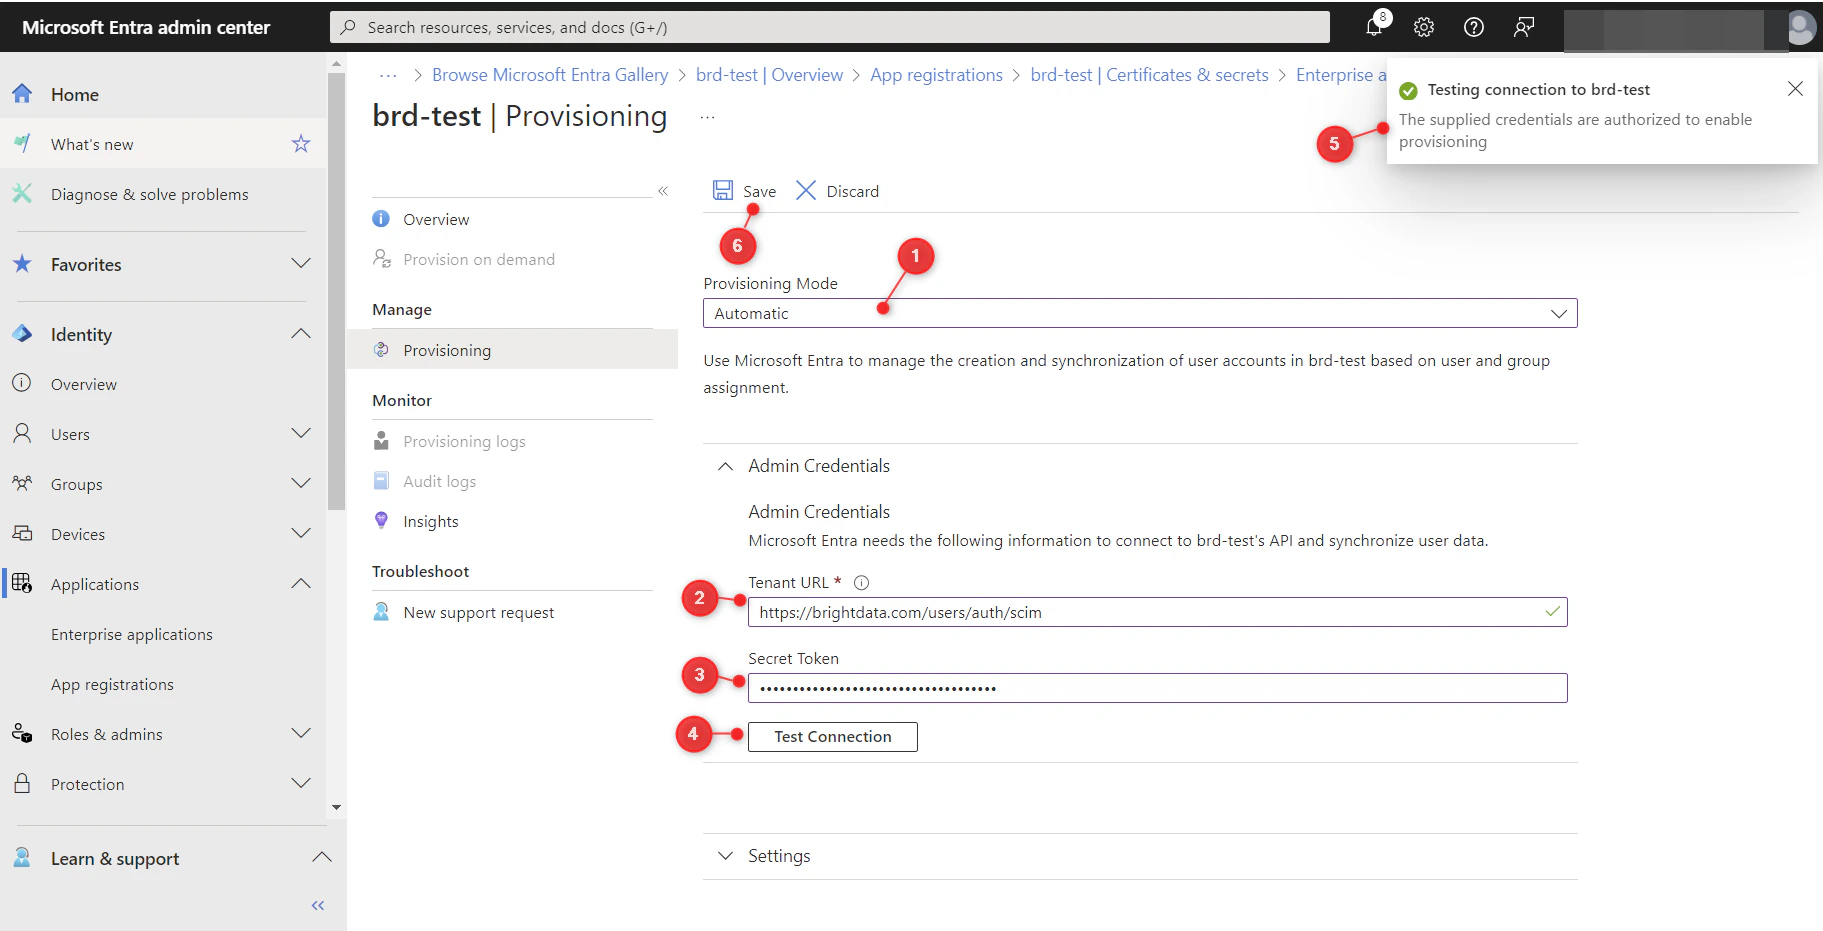
* Select “Automatic” Provisioning Mode
* Fill “Tenant URL” with [https://brightdata.com/users/auth/scim](https://brightdata.com/users/auth/scim) value
* Fill “Secret Token” with previously copied value from BrightData control panel settings
* Test Connection. You should see successful message in top right corner
Save Settings
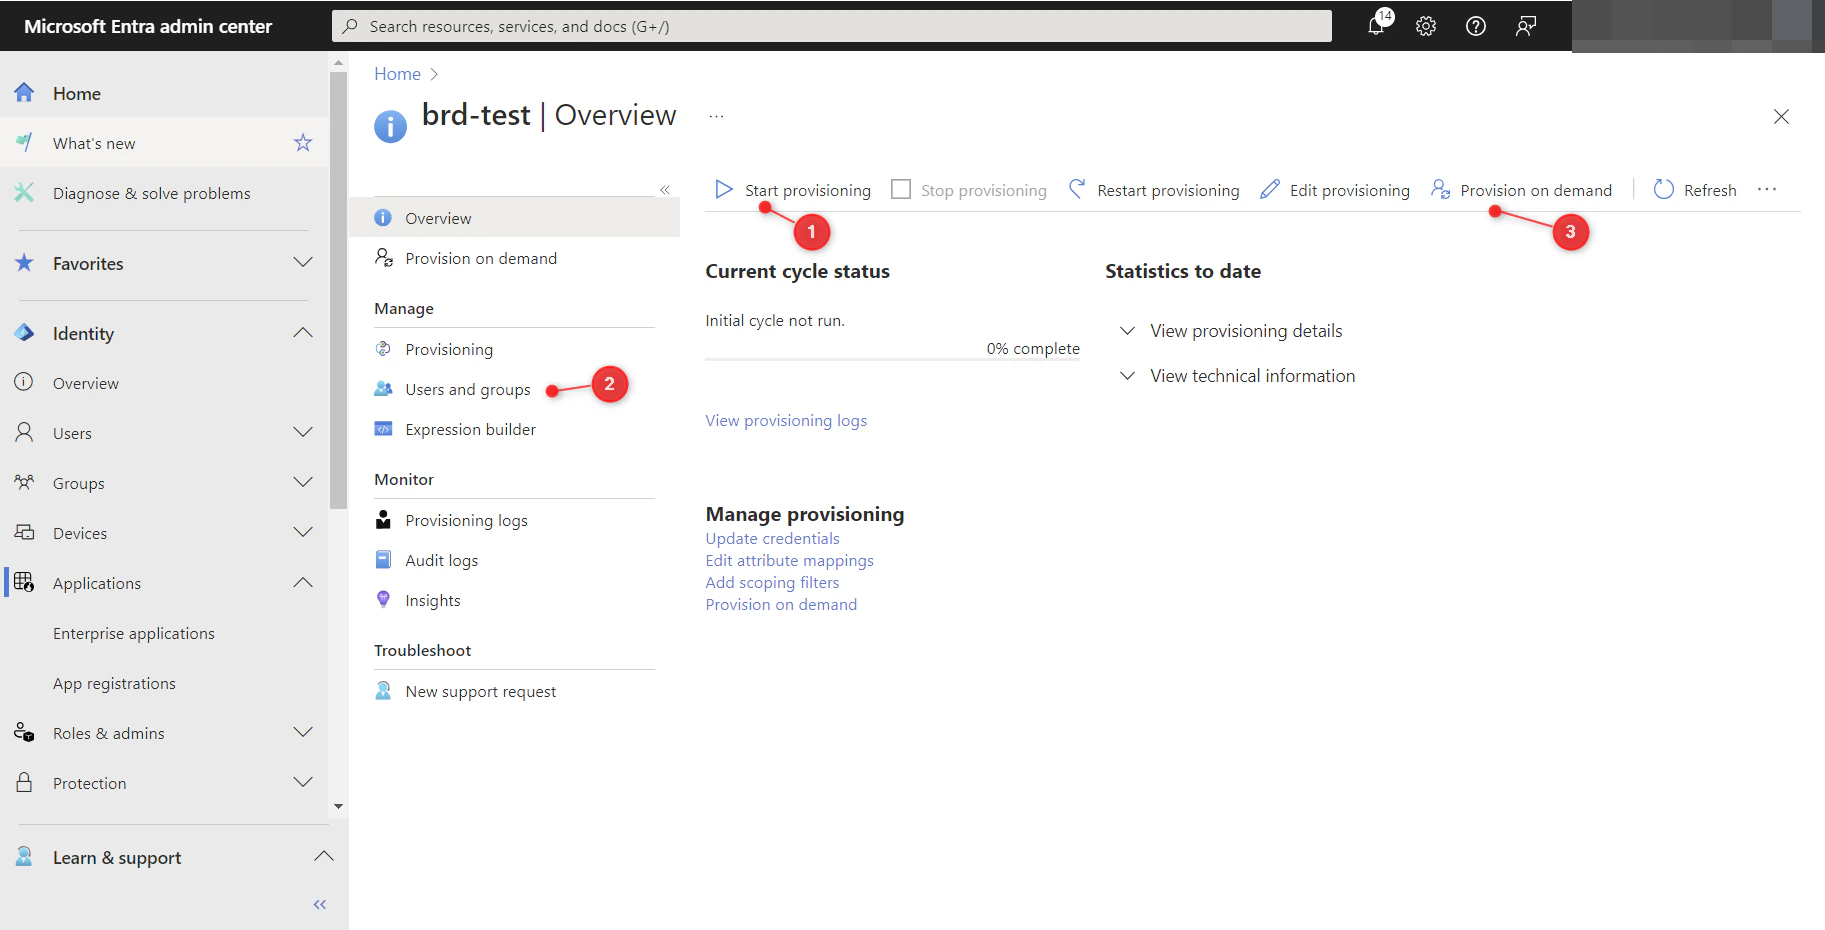
 * Return to “Overview” tab and click “Start provisioning”.
* You can test provisioning at “Provision on demand” page, but first assign your users to BrightData application at “Users and groups” page:
* Return to “Overview” tab and click “Start provisioning”.
* You can test provisioning at “Provision on demand” page, but first assign your users to BrightData application at “Users and groups” page: