RequirementsDocumentation Index
Fetch the complete documentation index at: https://brightdata-ipv6-release.mintlify.app/llms.txt
Use this file to discover all available pages before exploring further.
- An Okta organization account with admin permission
- A Bright Data account with admin permission
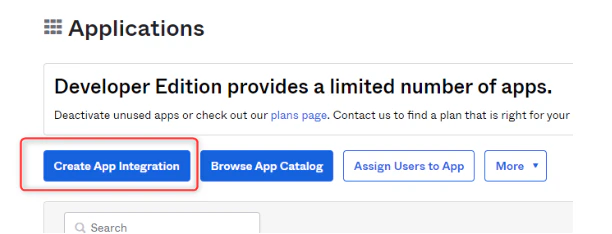
- On your Okta admin dashboard, choose ‘Applications > Applications’
- Click ‘Create App Integration’
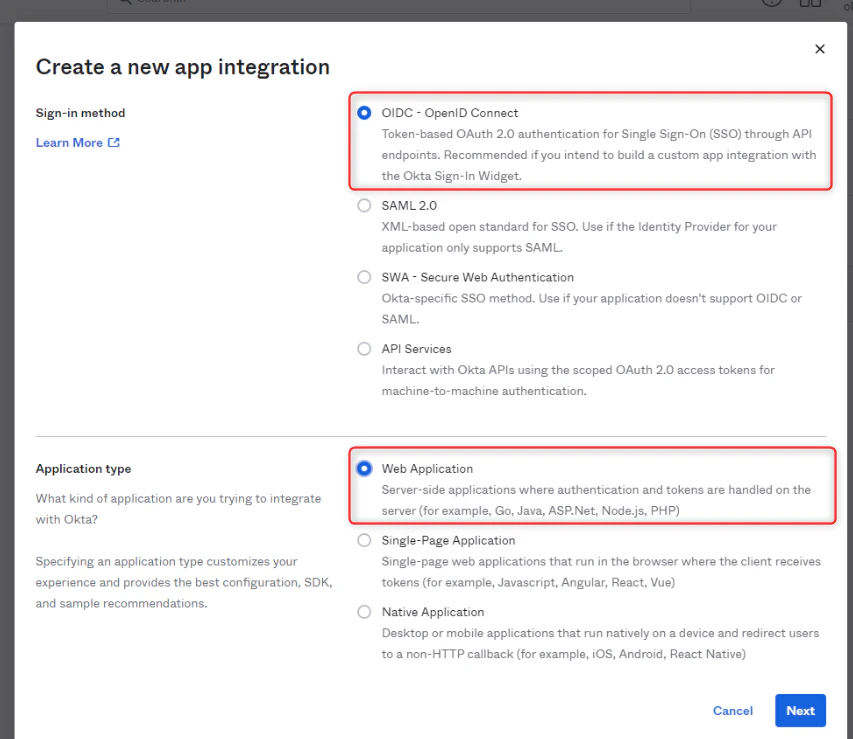
- Select ‘OIDC - OpenID Connect’ as the Sign-in method,
- Select’Web Application’ as the Application type and click ‘Next’
- At this point you should be redirected to a new web app integration page. Here you can name your app integration (we recommend to use “Bright Data Control Panel” name).
- At ‘Grant type’ select Implicit along with Authorization Code

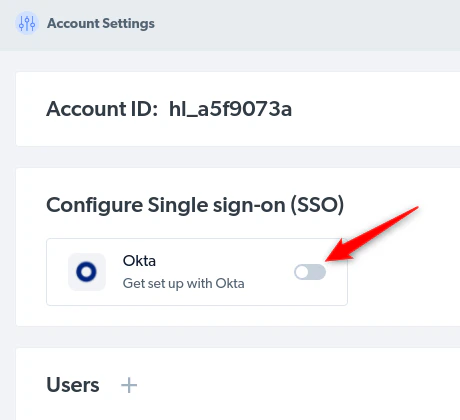
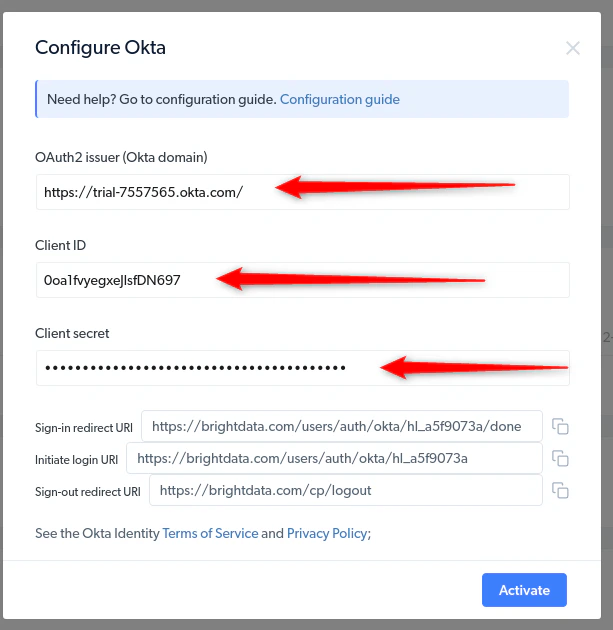
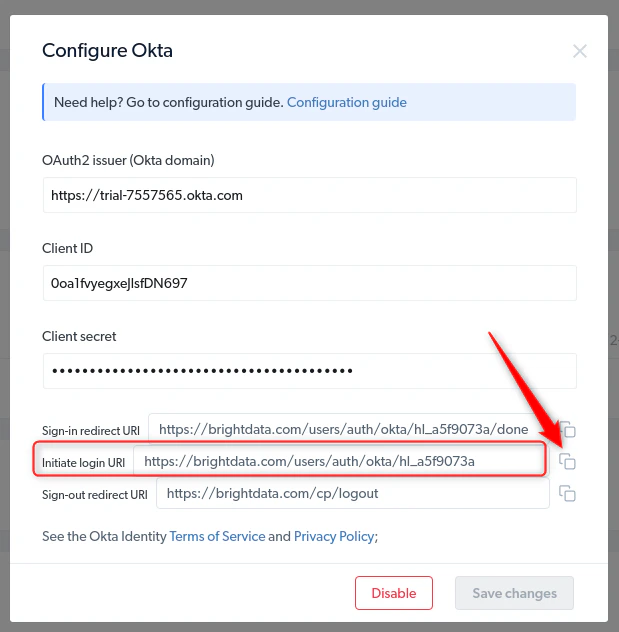
- Go to Bright Data Control Panel
- Open OKTA configuration dialog
- Copy “Sign-in redirect URI”

- Paste it to according field in New App setup in OKTA
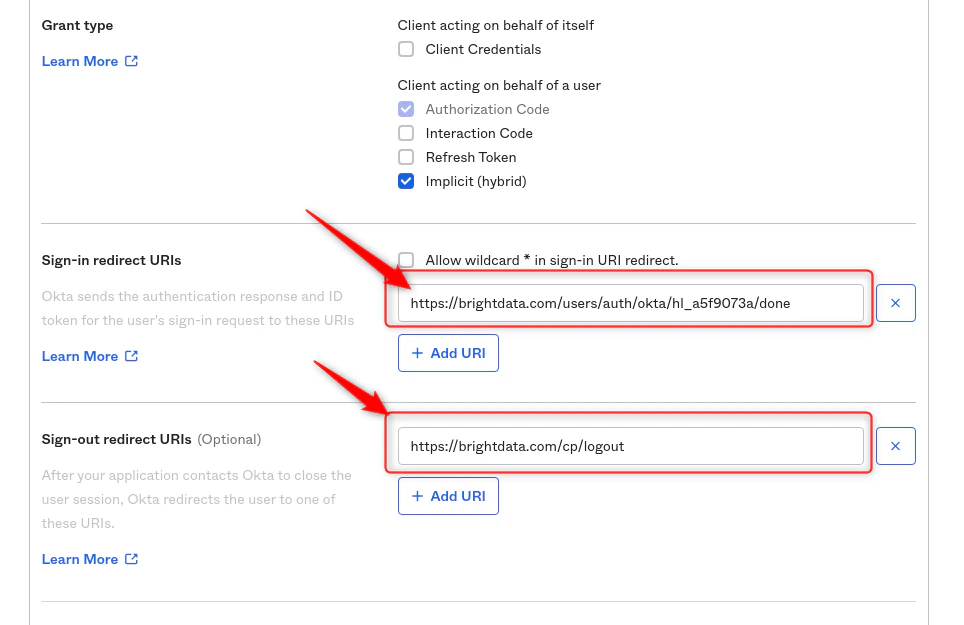
- Repeat the same for “Sign-out URI”
- At ‘Assignments’, select an access level as you want
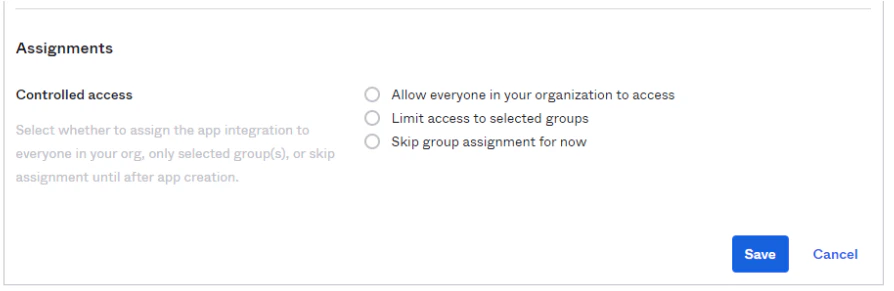
- Click ‘Save’
- Now, you should land on your new app integration settings page.

- Click “Activate”.
- Go to “Assignments” tab and assign users allowed to use this integration
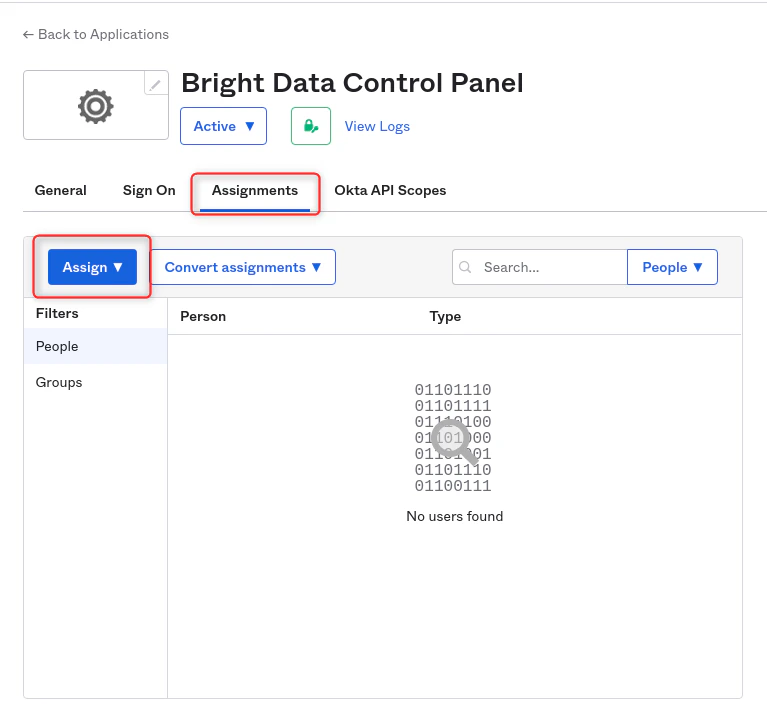
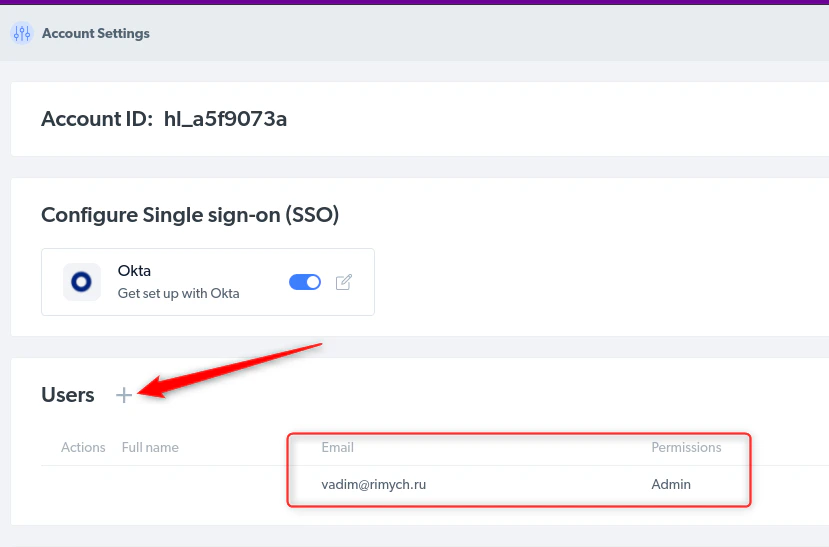
- Go to Bright Data Settings page and make sure all required users presented.
- Scroll down to ‘General Settings’ and click Edit
- Set these settings:
- Login initiated by: Either Okta or App
- Application visibility: Display application icon to users
- Login flow: Redirect to app to initiate login (OIDC Compliant)
- Copy Initiate login URI from Control Panel
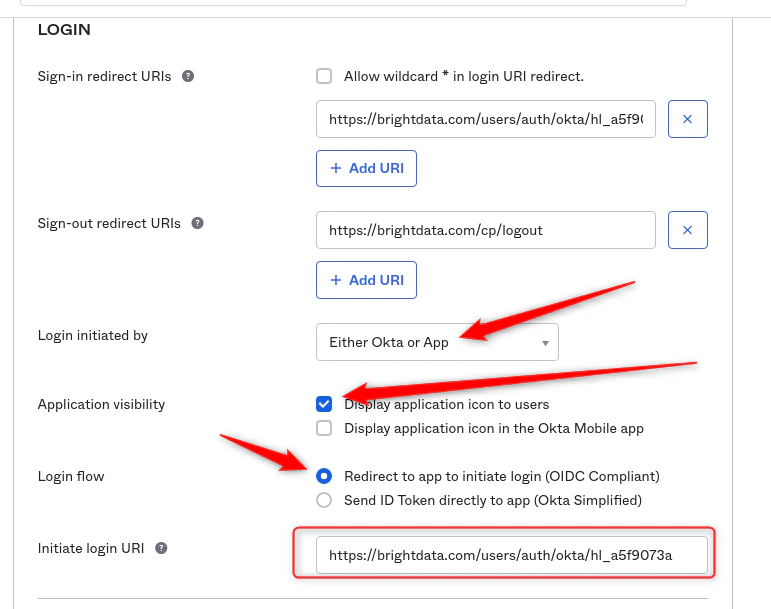
- Save changes. Now the integration is ready to work.
- Okta Domain should be the one that appears in your app integration settings (yourcompany.okta.com), NOT the one you are seeing as an admin (yourcompany-admin.okta.com)
- Make sure the Credentials provided to Bright Data are correct, we cannot check them on our side.
- Initiate login URI is needed if the you wants to be able to use the feature from the Okta Chrome extension or the Okta dashboard